If you use Office 365, your subscription comes with Azure Active Directory, that you can use to integrate authentication with your applications. This is a quick guide on how to configure Jenkins to authenticate using Azure Active Directory.
- Go to portal.azure.com and open Azure Active Directory from the left side menu
- Click on “App registrations”
- Click on “To view and manage your registrations for converged applications, please visit the Microsoft Application Console“
- In the Application Registration Portal this leads to, click on the “Add an application”. Give the application a name and unselect guided setup.
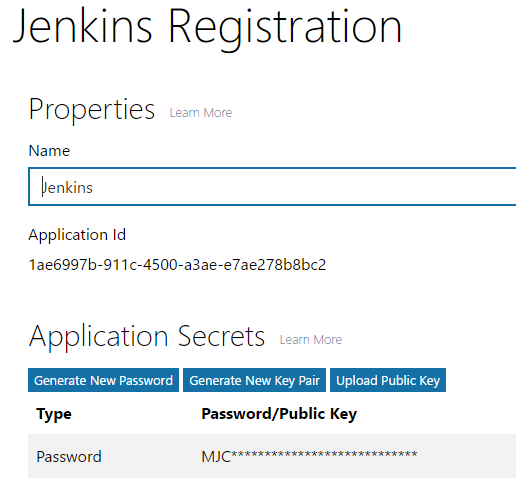
Give the application a name, note the Application ID and generate a password - Note the Application ID, such as 1ae6997b-911c-4500-a3ae-e7ae278b8bc2
- Click the “Generate New Password” and note it. In our example, MJCKoJn9hG68xzhaaf7Pvw
- Click the “Add Platform” button, select Web from the pop-up that appears.
- Leave checked “Allow Implicit Flow”
- in Redirect URL, enter: https://JENKINS_HOSTNAME/securityRealm/finishLogin
- Click again on the “Add Platform button”. This time select “Web API”
- In Application ID URI field, also enter https://JENKINS_HOSTNAME/securityRealm/finishLogin
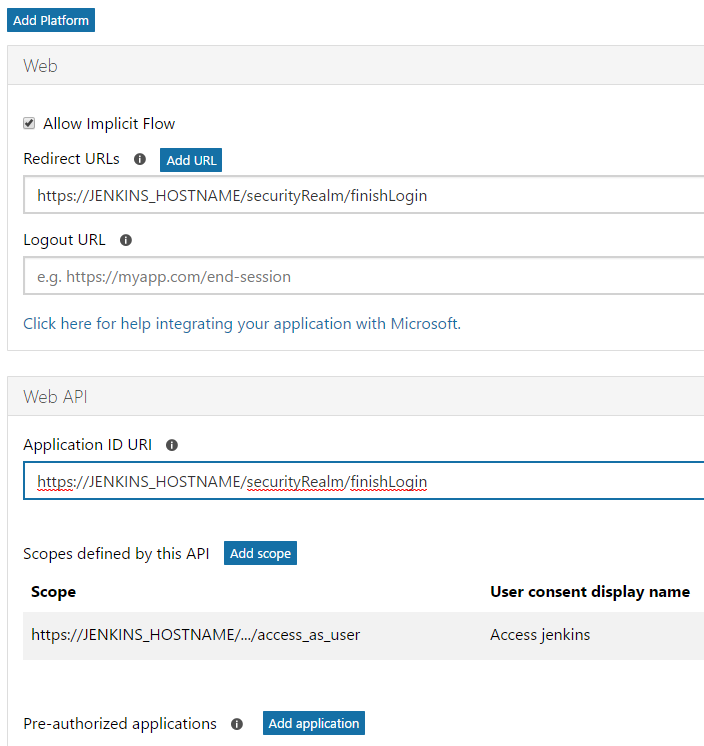
Add the Web and Web API platforms - Skip to the bottom of the page and enter https://JENKINS_HOSTNAME as the Home page URL
- Save
- Go to portal.azure.com and open Azure Active Directory from the left side menu
- Click on “App registrations”

Locate the endpoint URLs in Azure AD configuration portal - Click on “Endpoints” on the top menu
- Note the OAUTH 2.0 TOKEN ENDPOINT URL
- Note the OAUTH 2.0 AUTHORIZATION ENDPOINT URL
- Configure who will have access to Jenkins:
- Go to portal.azure.com and open Azure Active Directory from the left side menu
- Click on “Enterprise Applications”
- Click on “All Applications”. Find your new application and click on its name
- Click on “Users and groups”
- Add all the users you want to be able to access Jenkins
- Go to your Jenkins instance, Manage Jenkins, Manage Plugins, Available and install the OpenId Connect Authentication Plugin written by Michael Bischoff
- Go to Manage Jenkins, Configure Global Security
- Check “Enable security” if not already checked.
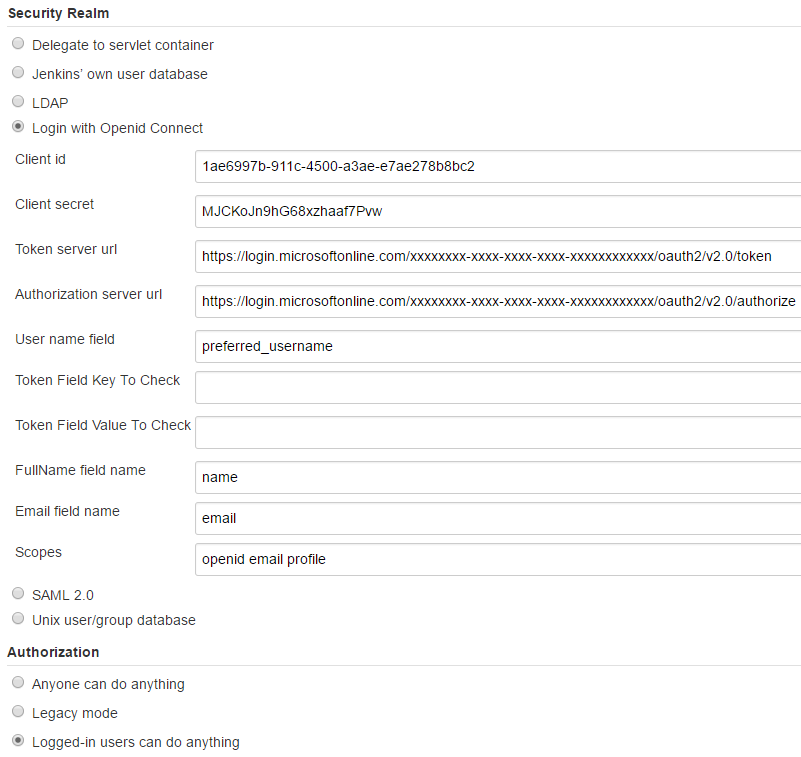
Jenkins OpenID Connect plug-in configuration for Azure - In Access Control, Security Realm select “Login with Openid Connect”
- In Client ID, specify the Application ID noted above.
- In Client secret, specify the Generated Password noted above
- In Token server url, specify the OAUTH 2.0 TOKEN ENDPOINT URL noted above
- In Authorization server url, specify the OAUTH 2.0 AUTHORIZATION ENDPOINT URL noted above
- In User name field, specify preferred_username
- Leave Token Field Key To Check and Token Field Value To Check empty.
- In FullName field name, specify name
- In “Email field name”, specify email, though I could not get the plug-in to use this value to fill the Jenkins profile.
- In “Scopes”, specify openid email profile
- Scopes specifies what information you are requesting. openid is required for authentication and profile is required to be able to access the preferred_username field. More info here: https://docs.microsoft.com/en-us/azure/active-directory/develop/active-directory-v2-tokens
- In the Authorization section, check “Logged-in users can do anything”. Disable “Allow anonymous read access”
- You can configure more complex authorization later, for now check if OpenID actually works.
- Log out of Jenkins, it should now redirect you to Microsoft for authentication


